实现一个脚手架相关的知识点
bin
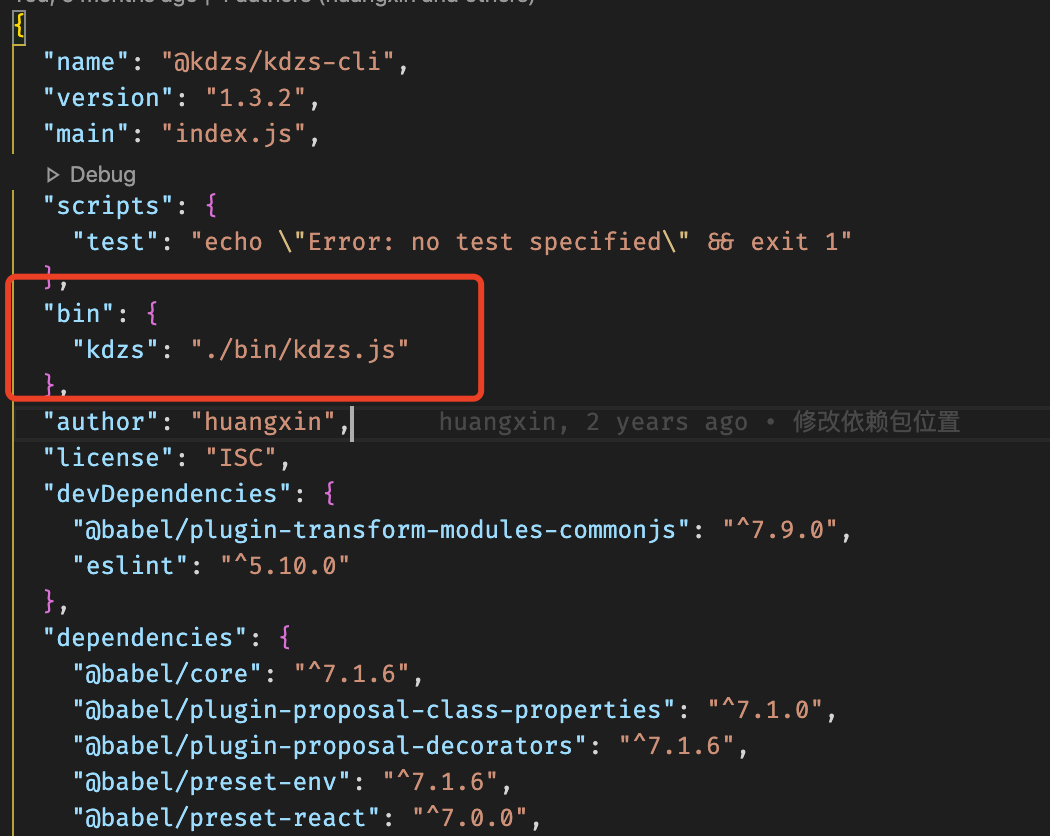
一个项目的 package.json 中有一个名为 bin 的对象
bin项用来指定各个内部命令对应的可执行文件的位置。Npm会寻找这个文件,在node_modules/.bin/目录下建立符号链接。在上面的例子中,someTool.js会建立符号链接node_modules/.bin/kdzs。由于node_modules/.bin/目录会在运行时加入系统的PATH变量,因此在运行npm时,就可以不带路径,直接通过命令来调用这些脚本。
关于 package.json 文件各个字段的介绍,可以参考这篇文章
当你 npm link 或者全局安装后(-g),使用对应的命令就会执行对应的文件
相关包
commander
commander 是最为重要的包,它提供了便利
声明
const program = require('commander');
选项 option
分为短选项:就是我们常见的 -v -h
和长选项:--version
可以根据用户的输入来决定要执行什么方法
program
    .version(pkg.version)
    .description('启动 kdzs-cli')
    .option('dev', '测试环境打包')
    .option('build', '正式环境打包')
    .option('start', '启动开发')
    .option('init', '初始化项目配置文件')
    .option('create', '创建项目')
    .parse(process.argv);


if (program.dev) {
    command('dev')
} else if (program.build) {
    command('build')
} else if (program.start) {
    command('start')
} else if (program.init) {
    init();
} else if (program.create) {
    create();
} else {
    program.help()
}
chalk
用来美化输出的,可以让控制台好看很多
用法也很简单
const chalk = require('chalk');

console.log(chalk.blue('Hello world!'));
inquirer
控制台用户交互用的
var inquirer = require('inquirer');
inquirer
  .prompt([
    // 把你的问题输在这里,
  ])
  .then(answers => {
    //得到用户的答案后,要做的事情
  })
  .catch(error => {
    if(error.isTtyError) {
      // Prompt couldn't be rendered in the current environment
    } else {
      // Something else when wrong
    }
  });
本质上就是给 inquirer.prompt 方法传递一个问题对象(questions)
inquirer.prompt(questions) -> promise这个问题对象的格式应当是这样的
//var inquirer = require('inquirer');
import inquirer from 'inquirer';

inquirer
  .prompt([
    {
        name: "option",
        message: '你从哪里来?',
        type: 'list',
        choices:['人间','月宫','none']
    },
    {
        name: "name",
        message: '你是谁',
        type: 'input'
    },
    {
        type: "checkbox",
        message: "你喜欢什么颜色:",
        name: "color",
        choices: [
            {
                name: "red"
            },
            new inquirer.Separator(), // 添加分隔符
            {
                name: "blur",
                checked: true // 默认选中
            },
            {
                name: "green"
            },
            new inquirer.Separator("--- 分隔符 ---"), // 自定义分隔符
            {
                name: "yellow"
            }
        ]
    }
  ])
  .then(answers => {
    console.log(answers,'? 很有趣' )
  })
  .catch(error => {
    if(error.isTtyError) {
      // Prompt couldn't be rendered in the current environment
    } else {
      // Something else when wrong
    }
  });
这篇文章写的挺好
download-git-repo
如果你需要初始化一些模板,就需要用到这个包了
通常大家都把模板放在 github 上,需要的时候在 download 下来
download('https://mygitlab.com:flippidippi/download-git-repo-fixture#my-branch', 'test/tmp', { clone: true }, function (err) {
  console.log(err ? 'Error' : 'Success')
})
ora
这个包提供了好看的「加载ing」效果
可以在中途修改颜色和文案等等
const ora = require('ora');

const spinner = ora('Loading unicorns').start();

setTimeout(() => {
    spinner.color = 'yellow';
    spinner.text = 'Loading rainbows';
}, 1000);

setTimeout(() => {
    spinner.stop()
}, 2000);
execa
execa用来执行命令
注意:
如果要执行 shell,必须option 中配置{shell:true}
配置stdio: 'inherit' 可以原样的打印执行脚本的打印内容;如果不配置的话,你会发现什么都不会打印出来
例子
execa('npm run build-print-test',{shell:true,stdio: 'inherit'} );

